
Hey everyone, I’m Carla from Hammers and High Heels and I am so excited to be guest posting for Hannah today! I love stopping by her blog to see her cute fashionable finds and glamorous decor updates- all done on a budget of course, which is something she and I have in common! Well that and probably having a closet full of crazy high heels 🙂
I do consider myself a glam gal but as my blog tag line says, I’ve traded them in for a hammer since my husband and I bought our first home. The usual posts over on my blog revolve around all the budgeted DIY home renovation and decor projects we’ve taken on. One example being our living room shown below…

Even though I love blogging about home DIY-ing and decorating, I sometimes wish I could talk about fashion more… it’s just fun… and your husband can’t win an arguement with you about fashion 🙂 I love seeing new fashion trends and I think it’s fun finding them at prices that fit my budget. What can make those trends even more fun?!? When you can DIY them!
So let’s DIY-it with the embellished dress shirt and blouse collars I’ve been seeing everywhere!
I think it’s a fresh new twist on the embellished bib collar and necklaces that I loved last fall. Here’s a look at a few I found doing some online ‘window’ shopping….

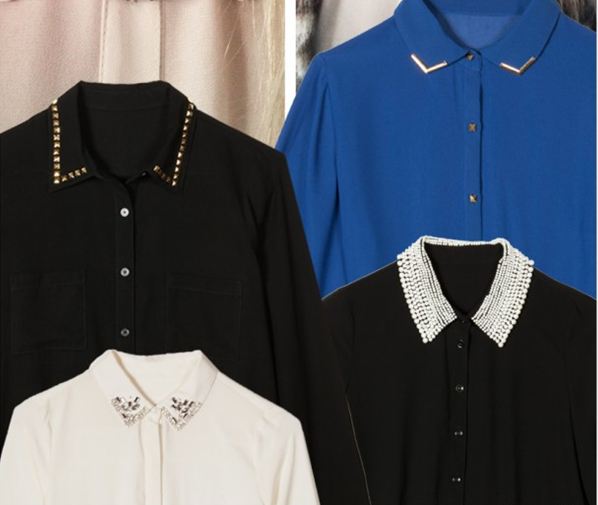
They are fun, simple, and can add a fun detail to layered fall looks!
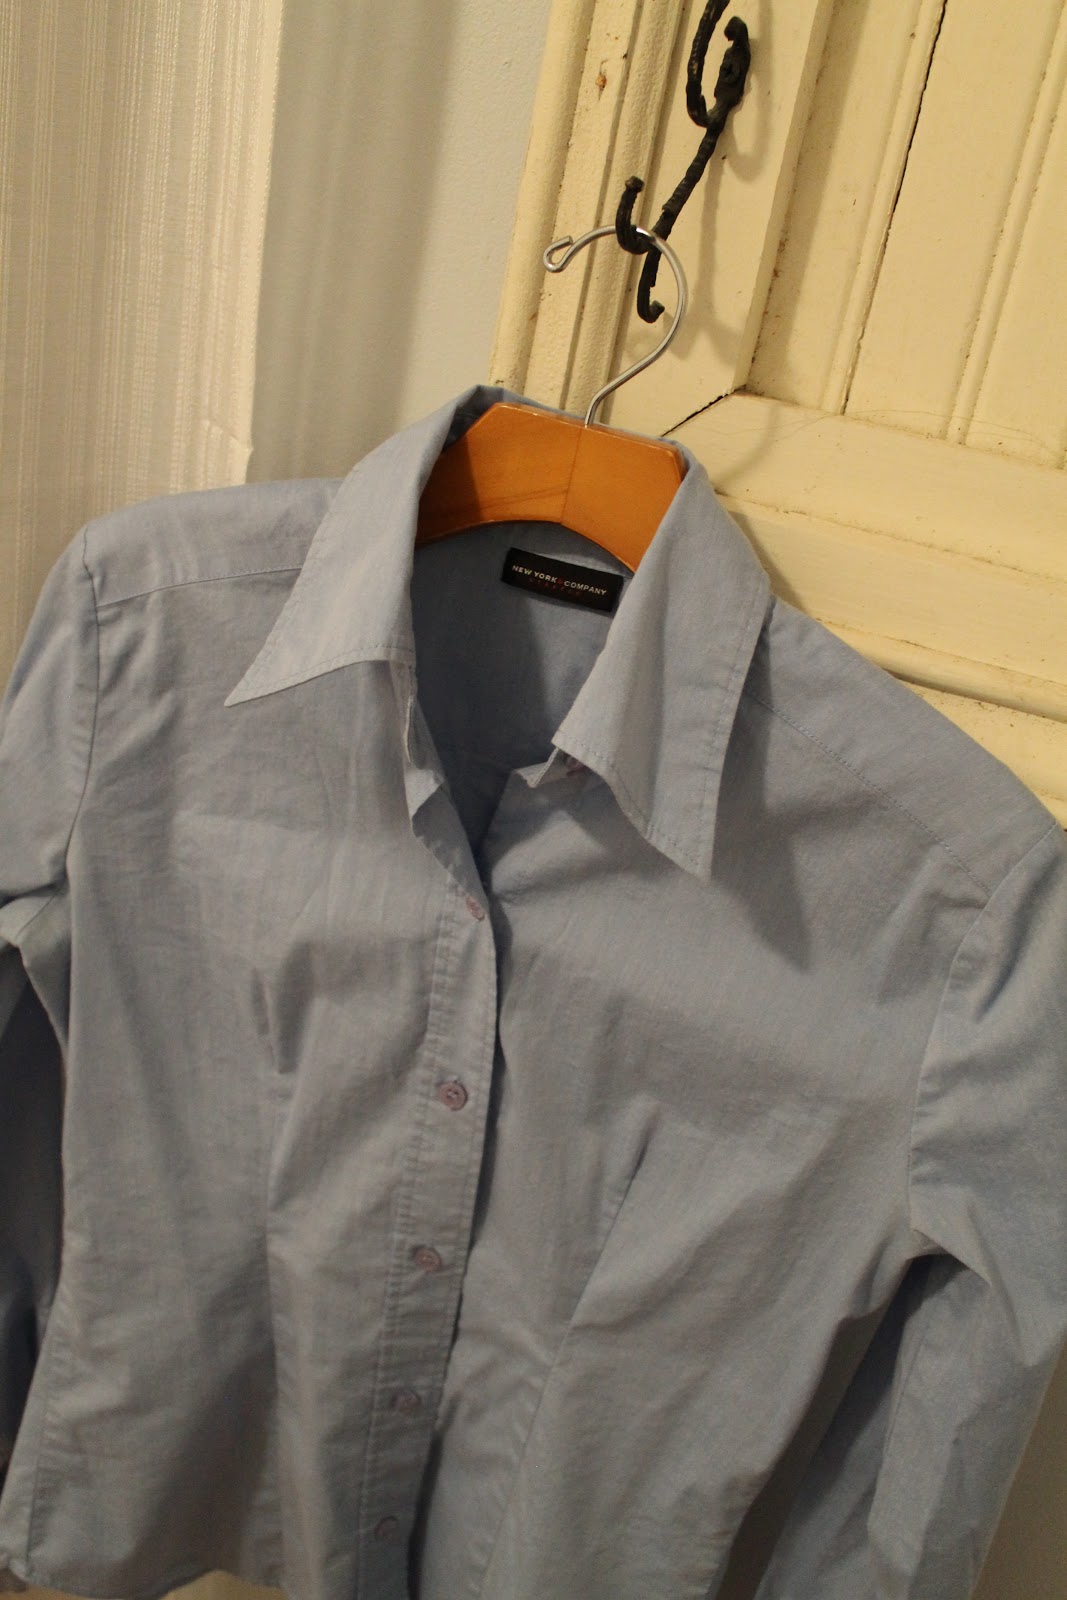
A few of the embellished shirted I loved the most actually had pretty simple embellishments, so I thought I could DIY them in a snap! I grabbed a dress shirt from my closet that I haven’t worn in quite a while which to me always means it needs to be tweaked or tossed. But it fits great so this DIY tweak will be perfect!
A few of the embellished shirted I loved the most actually had pretty simple embellishments, so I thought I could DIY them in a snap! I grabbed a dress shirt from my closet that I haven’t worn in quite a while which to me always means it needs to be tweaked or tossed. But it fits great so this DIY tweak will be perfect!
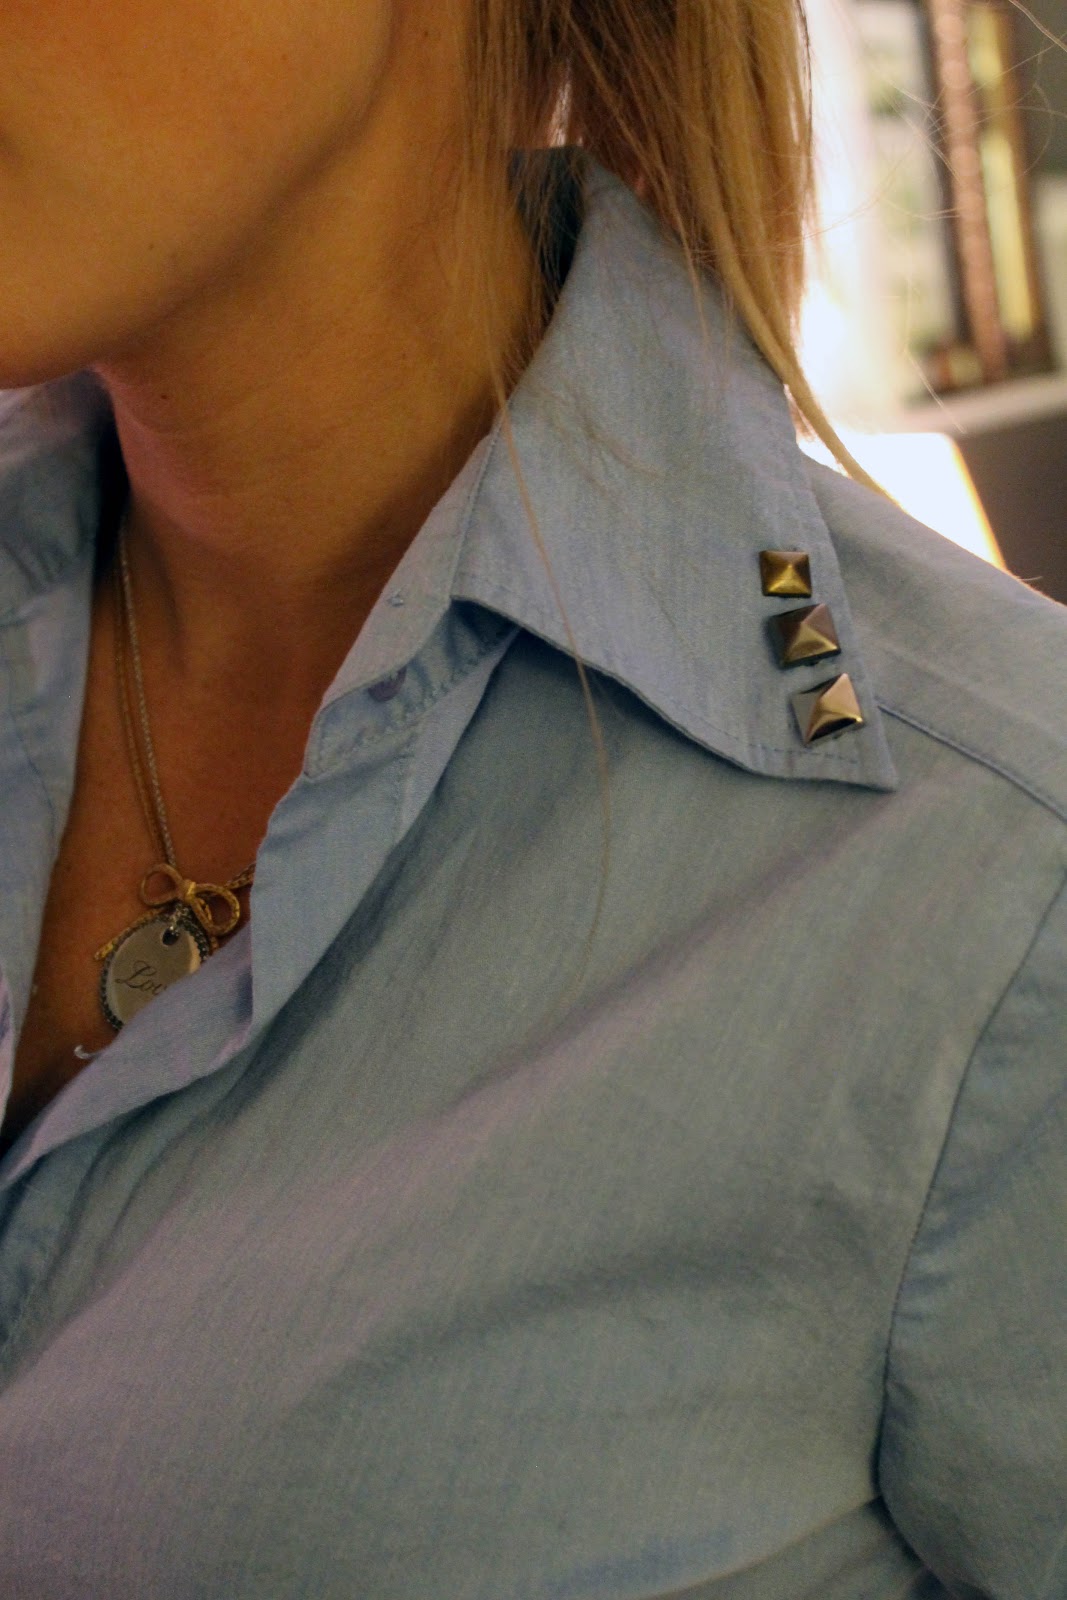
I took these metal stud embellishments with pronged backs to add onto the collar. I got them at JoAnne’s a while back to use on a pillow. Prong back embellishments are easy to add on without having to sew or use fabric glue (glue is always a bad idea with fabric). You simply press the open sharp end of the prongs into the fabric and once they are through you push them down to lay flat. Easy-peasy right?

I added just three studs on each side of the collar and loved the POP it gave to my drab shirt. Since I used mixed metals for the studs I layered on a couple of my favorite silver and gold necklaces to finish the look.
Super simple fall trend DIY complete! Hope you enjoyed it and feel inspired to spruce up a collar or two too!
Thank you again Hannah for letting me stop by Champagne Lifestyle on a Beer Budget and I hope some of you out there get a chance to stop by Hammers and High Heels to say hello and check out our home befores, afters, DIY-ing, and all the weird stuff in between!
***************
Thanks Carla! I need to try this DIY! Make sure you guys check out her blog… her house transformation is amazing and she knows how to do things the affordable way! Gotta love it! xo

Looks awesome! Cute post!
So excited to see my post! Thanks again for having me Hannah!
I've totes been in love with shirts like these lately! Looks easy enough, may have to give it a try!
This is such an easy DIY so I am on board! It really updates the look of the shirt!!! Happy to have found you via Hannah's always fabulous blog!
xx
Holly Foxen Wells
GlamourMash
ooooooh….loving these embellishments – so easy, and so cute! 🙂
cute DIY!! studs are ver popular right now
I love those studs! Designed-collar shirts are unique and different 🙂 Love it!
Btw i've just followed your blog, let's follow each other? Hee. I love reading your posts!
Ahhh, love this!!! Love anything DIY. Turned our great! New follower and excited to read more. xo
What a fun DIY – I am loving this style and great guest post! 😉